
Adam Spannbauer
Data Scientist/Instructor・Mostly write Python & R for pay・Mostly write p5js for fun・Check me out @thespanningset on Instagram
Tutorial: Facebook Messenger Chatbot with AWS Lambda & Python (written by an R programmer)
Published Apr 09, 2017
Note: Please let me know if you follow the tutorial and are unable to setup a messenger bot successfully; I’d be happy to update the steps to make the tutorial more useful. Please submit an issue describing the problem or if you know the fix please feel free to submit a pull request to the repo with a modified README.
Steps:
I. AWS Stuff
Lambda Stuff
-
Login/create an AWS account at aws.amazon.com
- Create a blank lambda function (no need to set a trigger at this point)
- If you’ve never created a lambda function before follow this guide to create a Hello World python function. We’ll use the same setup in this example.
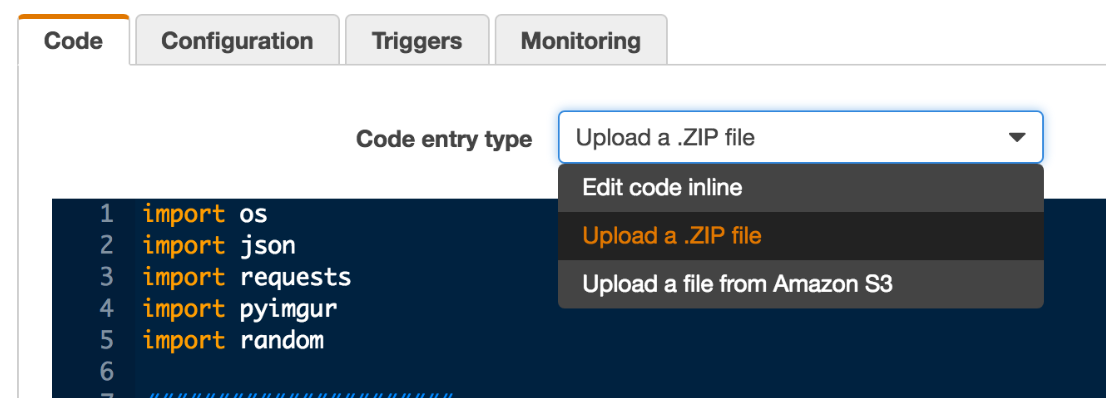
- On your new function’s page on the Code tab, select upload a .ZIP file, upload the file parrot_lambda_env.zip from my github
- The contents of the zip file are the contents of the parrot_lambda_env directory in the same repo. The directory contains the python module requests and a python script with definitions for functions to handle messenger events
API Gateway Stuff
-
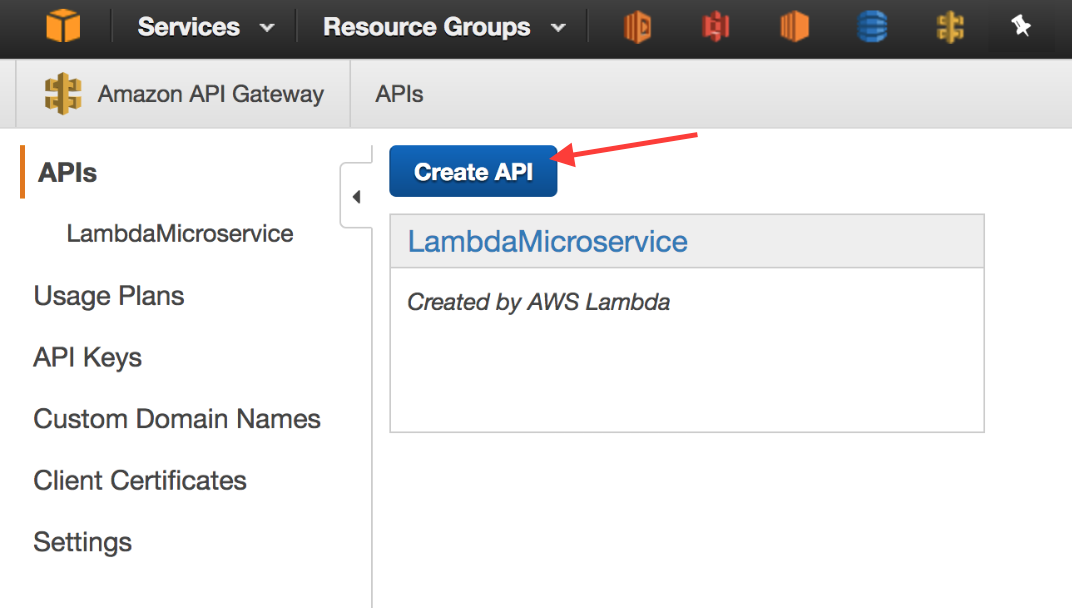
Go to API Gateway
-
Create new api
- After clicking Create New API, select New API, and give your API a name & description
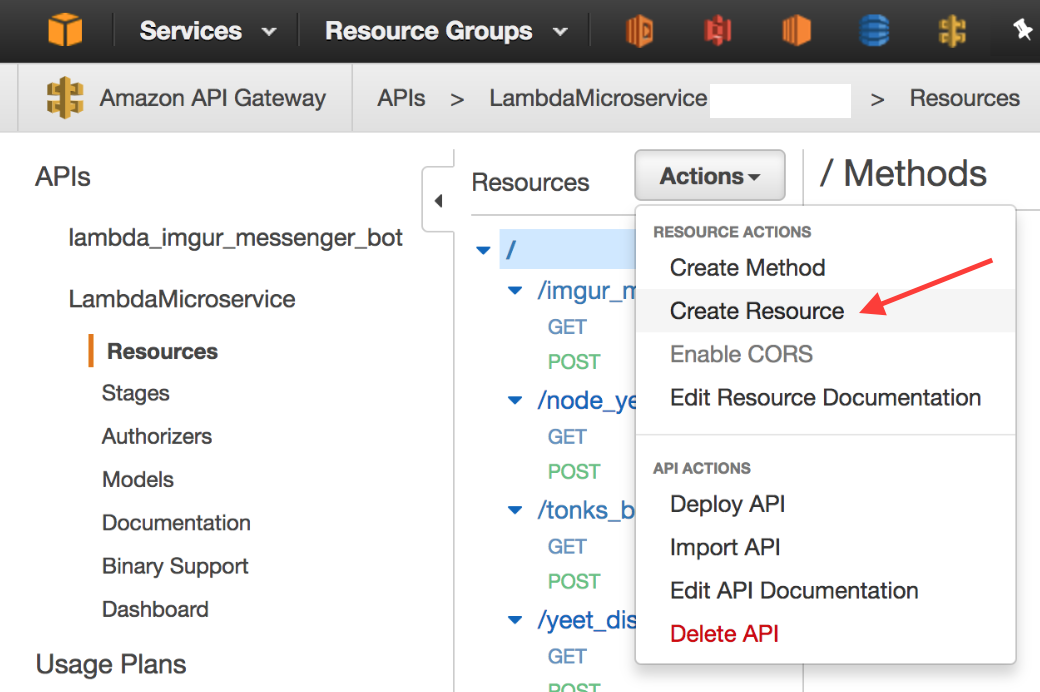
- Create a new resource
- Click Actions, select Create Resource from the dropdown menu, and give your resource a name & description
-
Create GET and POST methods
- Click Actions & select create method
- Select GET from the select menu that appears below your resource name
- Select Lambda Function for the integration type, select a region near you, and fill in the name of your Lambda Function in the text input that appears after selecting a region. Save all of your these settings to continue.
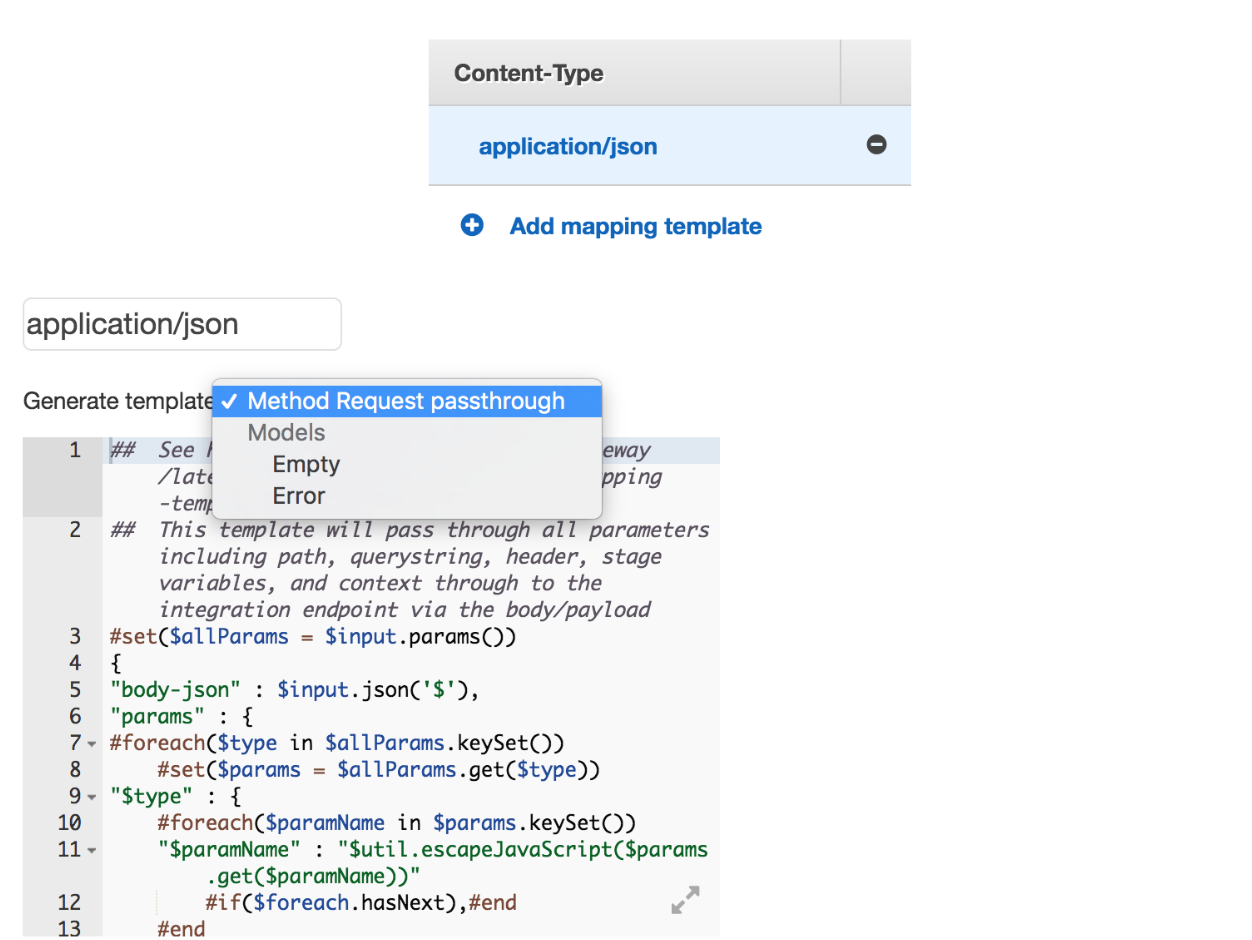
- Select Integration Request and expand the section for Body Mapping Templates
- Type ‘application/json’ in the text input and click the checkmark
- Select Method Request passthrough from the Generate Template dropdown and click save
- Repeat the same process to create a POST method
- Deploy your API
- Click on your Resource in the list of Resources, click Actions, and select Deploy API
- Select the deployment stage and a description then click Deploy
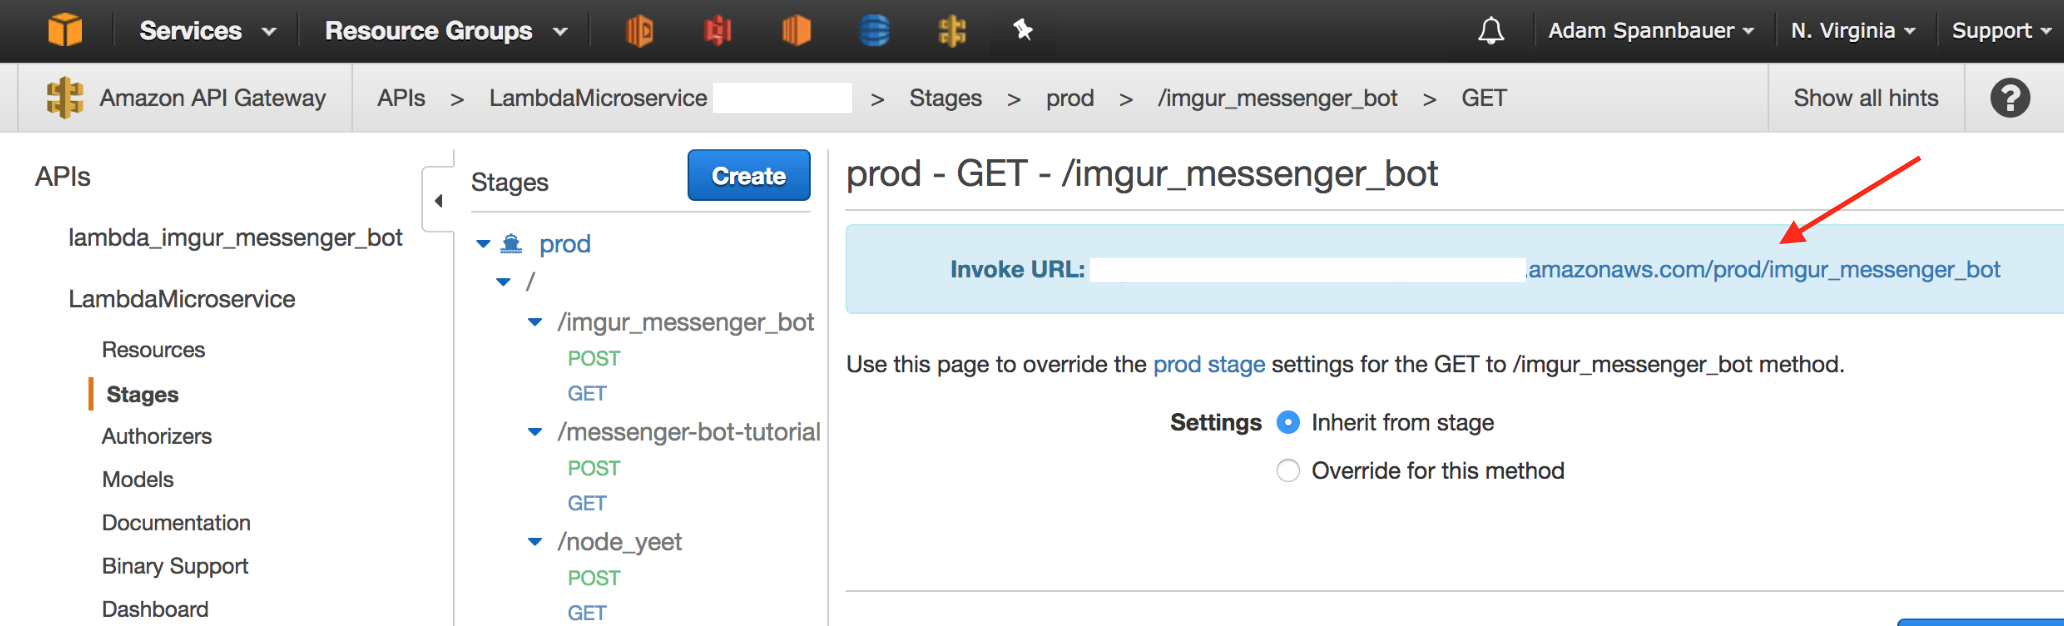
- Copy the invoke URL for your API resource
- From the Stages page of your API click on your new resource you just created
- Save the Invoke URL that appears for use later
II. Facebook Stuff
- Login/create account at developers.facebook.com
- Go to your app page & create a new app from the sidebar; fill in a display name and contact email & click create app id

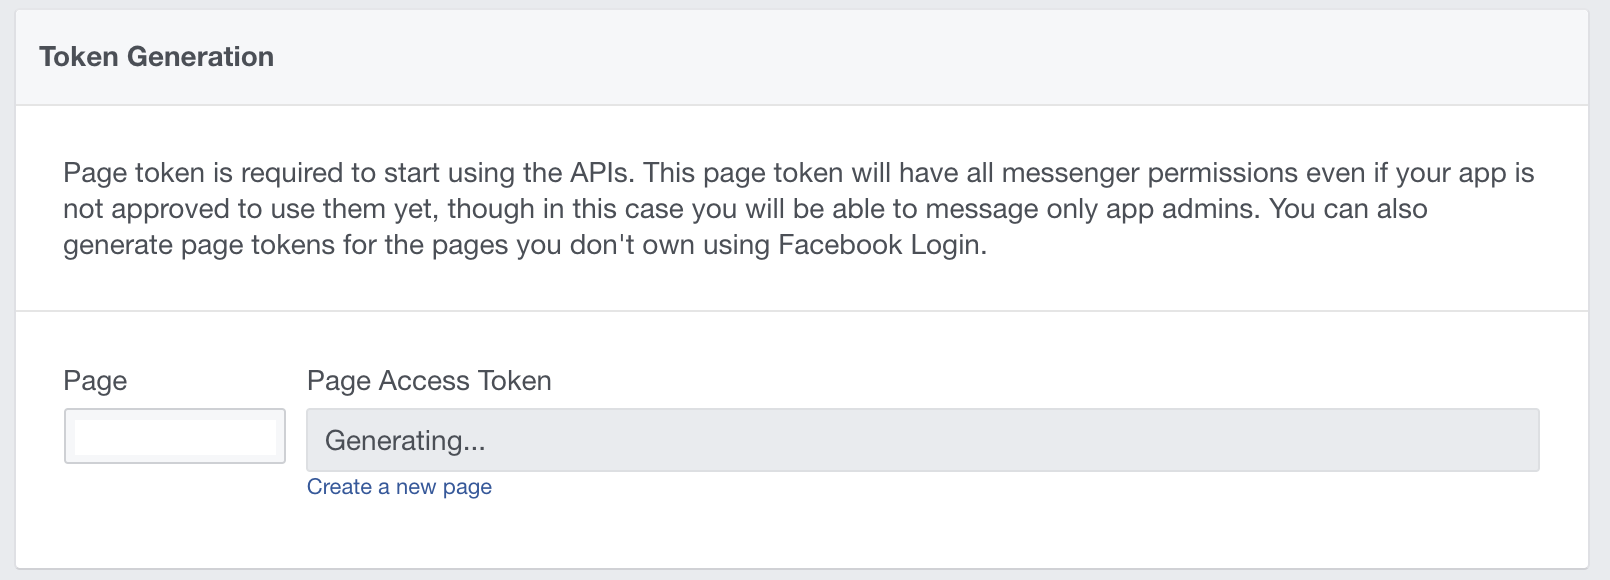
- Generate Access Token
- Click Add Product in the sidebar of your new app’s dashboard and click Get Started in the messenger section
- Scroll down to the Token Generation section and select/create a page for your bot to send messages from
- Save the access token that is generated for later
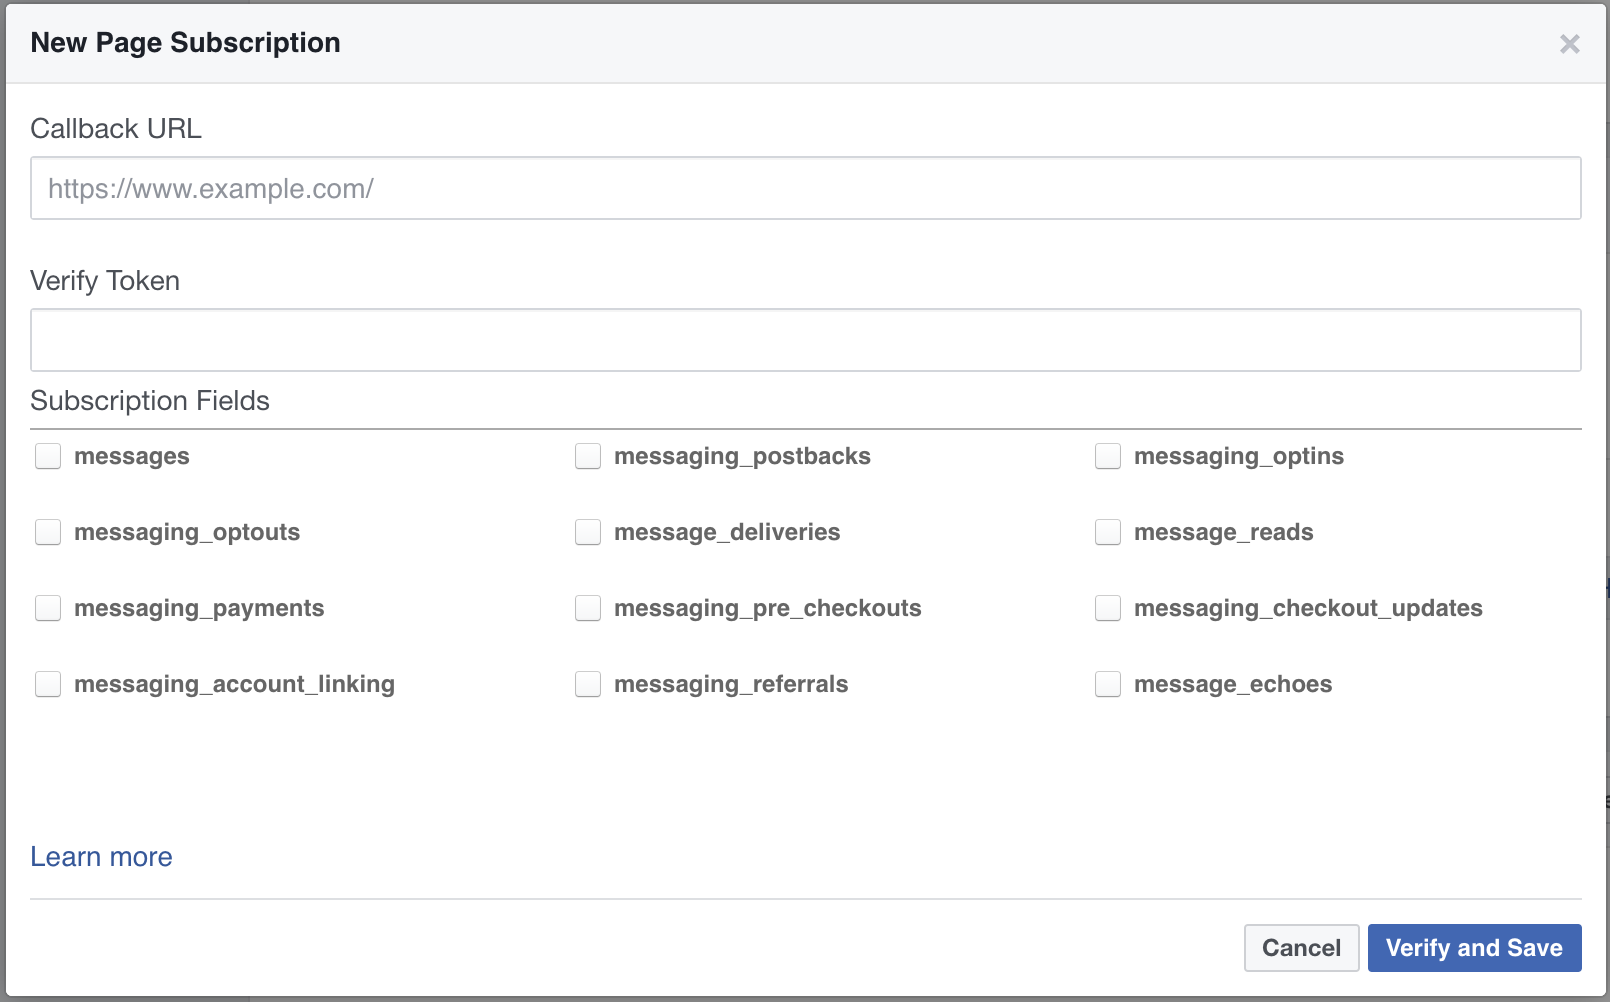
- Set up webhook
- Scroll down to the webhooks section of the messenger product settings and click setup webhooks
- Paste you Invoke URL from the API Gateway setup into the Callback URL field
- Make up a verification token and fill out the Verify Token field; save the token with the access token for use later
- Check all of the subscription fields for now
- Leave the window open, after some setup on the Lambda function we will be able to verify the webhook
III. Deployment
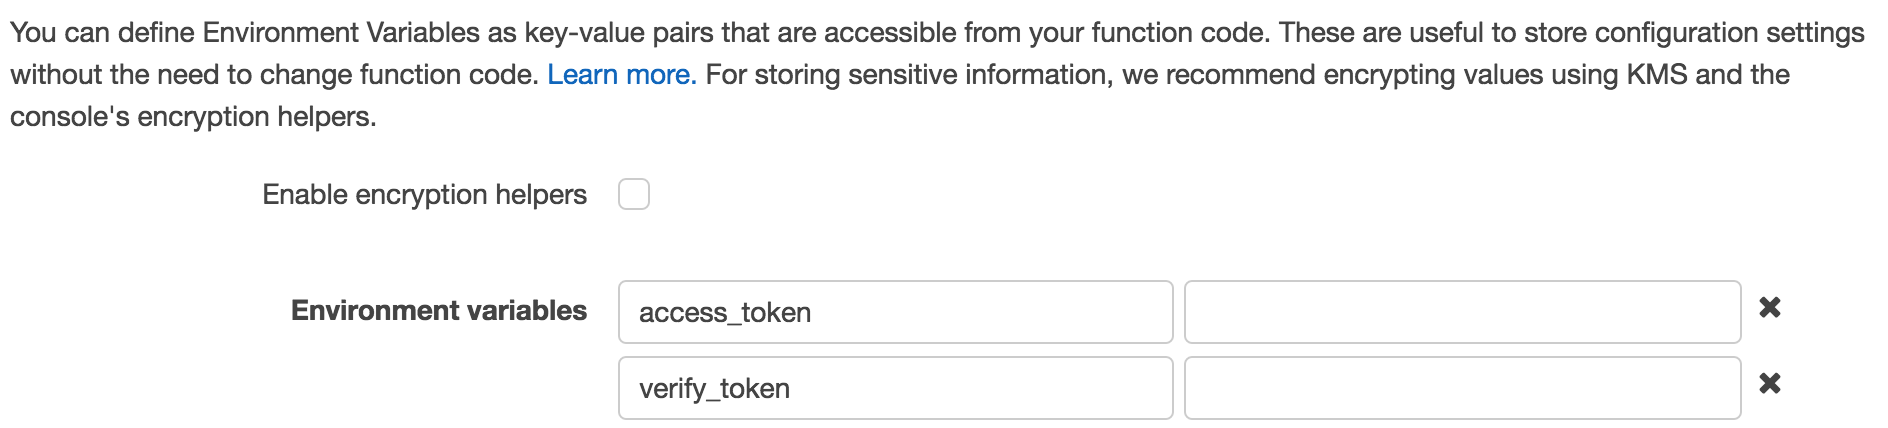
- Define Environment Variables for your acces and verification tokens
- Navigate back to your Lambda function’s code tab and scroll to the bottom to the Environment Variables section
- Define 2 environment variables named
access_tokenandverify_token; paste in the values of your tokens saved during facebook setup
- Verify webhook
- Click Verify and Save on the New Page Subscription window
- The setup we’ve done with API Gateway & Lambda should lead to a successful verification
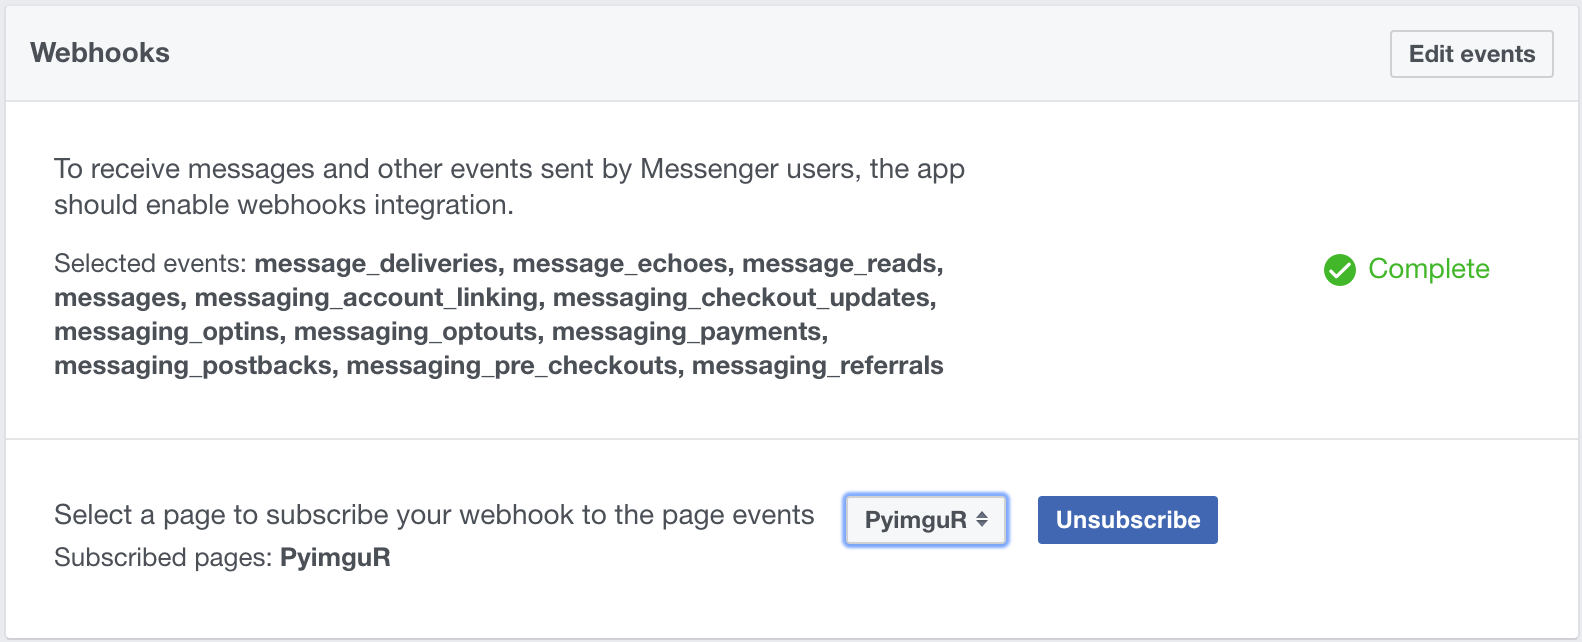
- Subscibe a page to your webhook
- Select the page who’s access token you set as the environment variable from the dropdown in the webhooks section and click subscribe
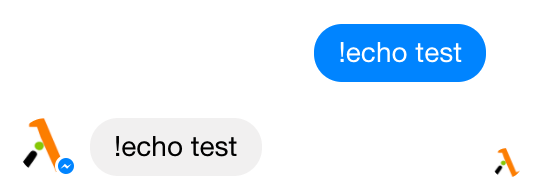
- Test the bot
- Message the subscribed page through your facebook account
- If everything is set up correctly the bot should echo your message text back
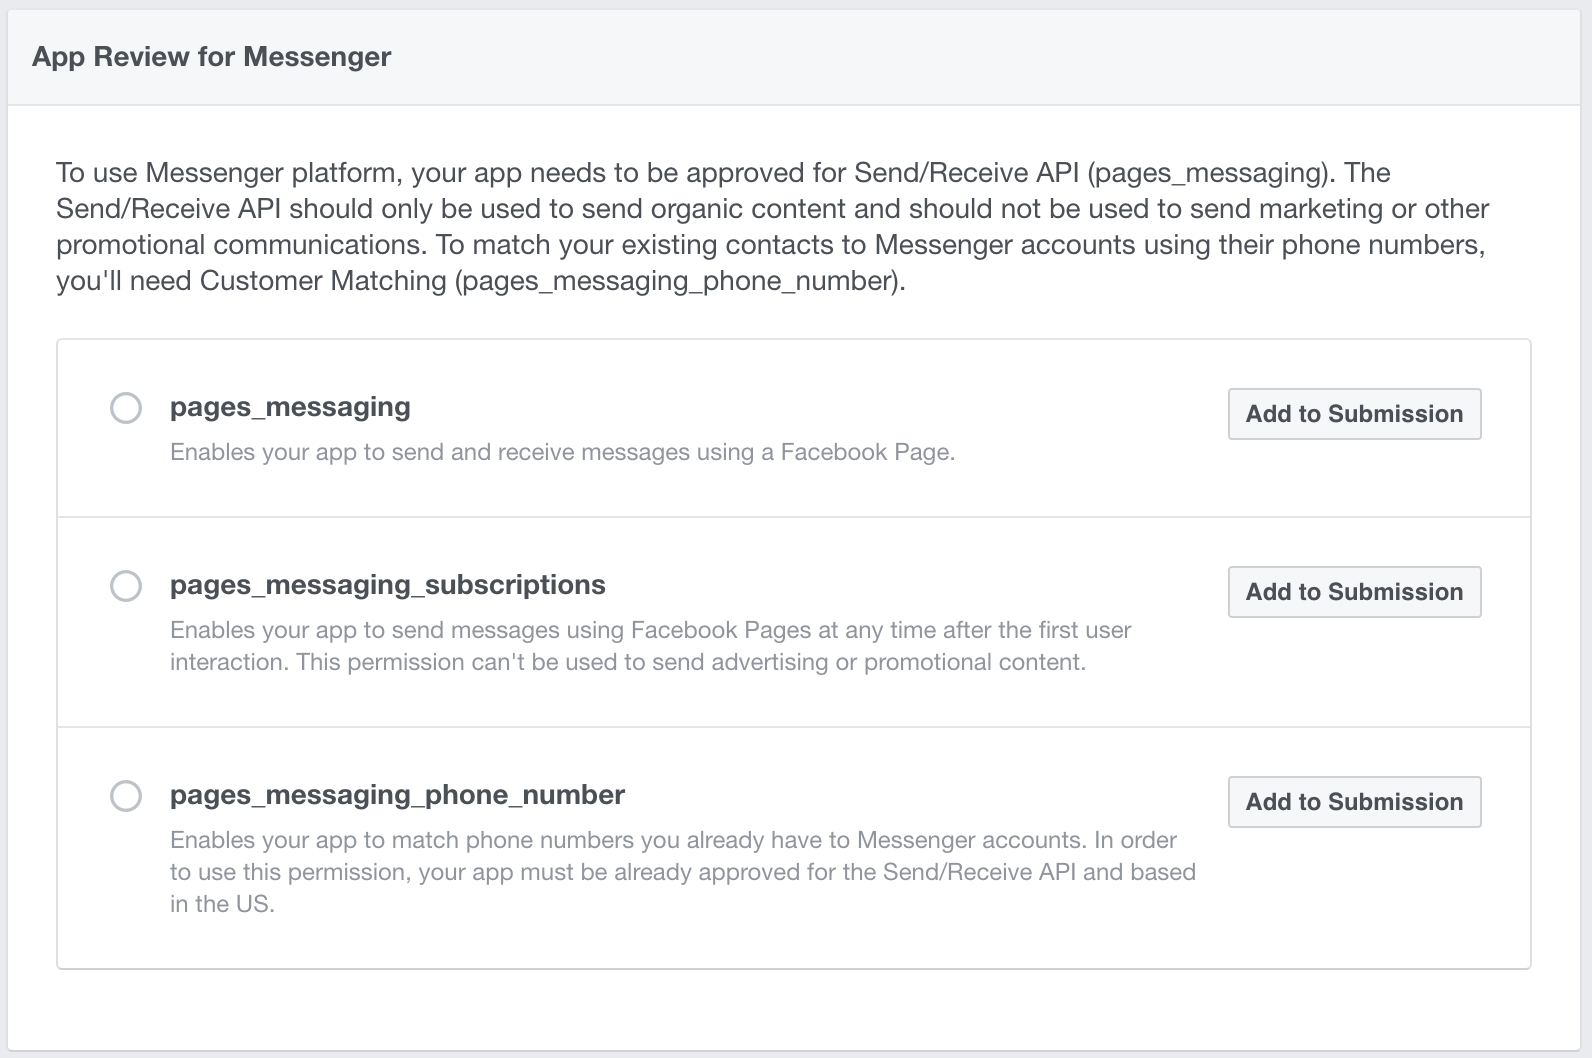
- To make your bot available to other users you will have to submit it for approval
- Click add to submission in the App Review for Messenger section of your app’s messenger product settings
- A current submission section will appear and tell you what items you must take care of before submitting (I used privacypolicies.com for the privacy policy needed for approval)
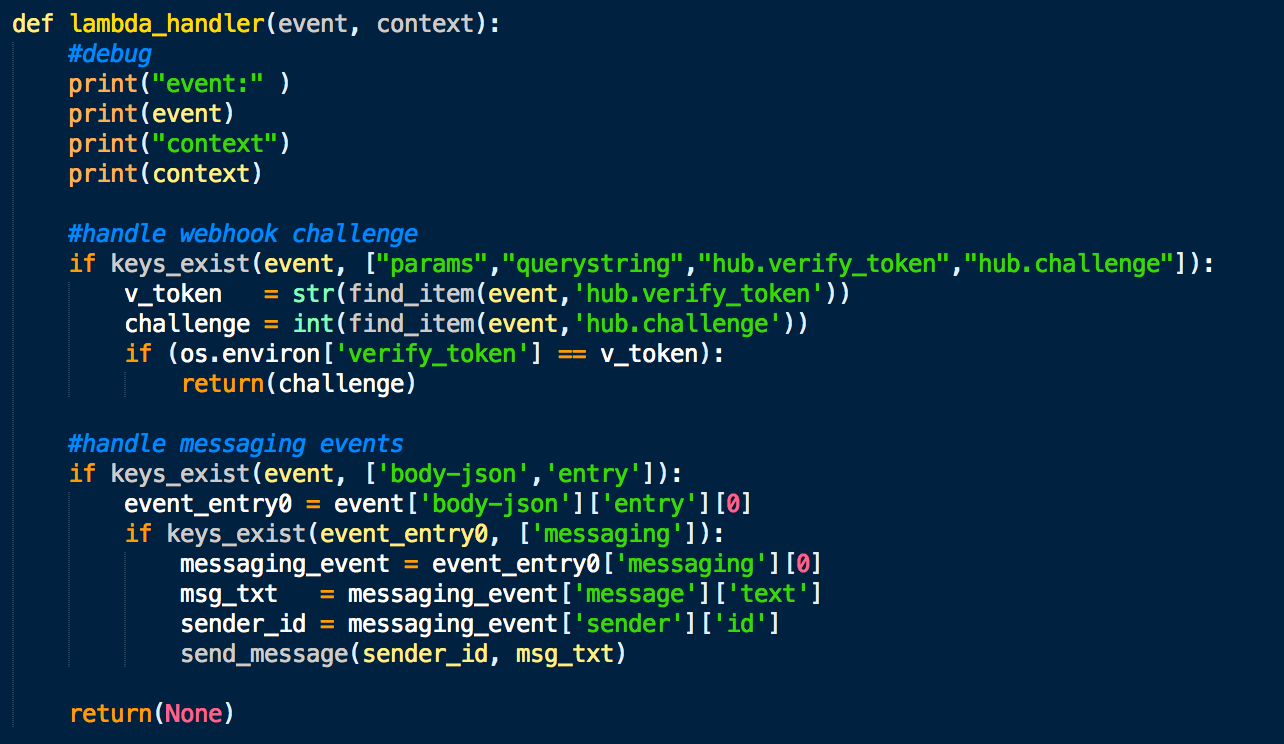
IV. Customizing Functionality
- To add more interesting functionality you can edit the lambda_handler function definition in lambda_function.py
- You can add whatever logic you want to produce a customized response
- Once you add the additional logic you can replace msg_txt in the send_message function call
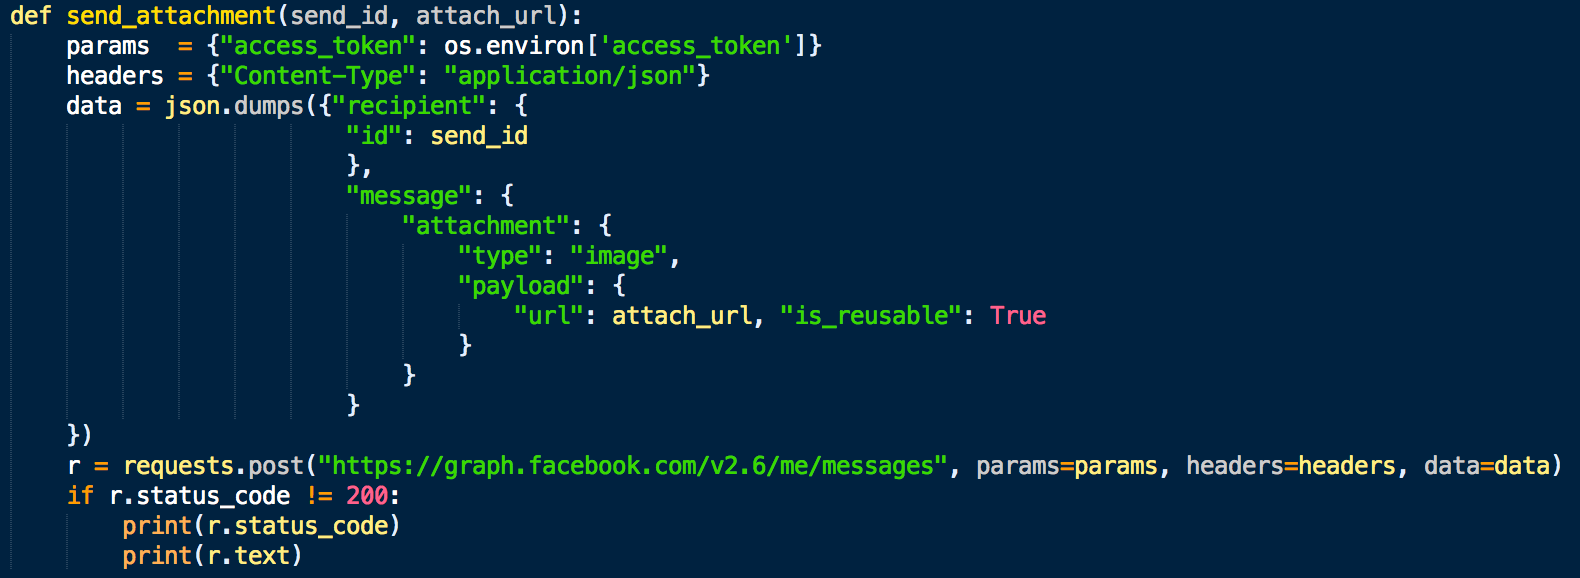
- Sending Attachments
- An example of how to send attachments can be seen in here in a bot written to send a picture response from imgur
- You can try out using this bot yourself by uploading the imgur_lambda_env.zip as the lambda function to be set up just by using steps I-III of the tutorial (you’ll just need to add an imgur client id as the environment variable
imgur_client_id) - The imgur bot searches messages received on imgur and responds with a randomly selected picture from the search results
- Adding additional modules
- If you need add additional python modules to acheive your desired functionality you can follow this AWS Lambda tutorial for creating a python deployment package